Los Padres National Forest Implements Level IV Fire Restrictions [UPDATE: Lifted December 11, 2013]

UPDATE: Now that we’ve had some rain here along the Central Coast, Level IV fire restrictions for the Los Padres National Forest have been lifted. A California Campfire Permit is still required to build a campfire outside of a designated Campfire Use Site. Details of the relaxed fire restrictions now in effect can be found on the Los Padres National Forest website. Be aware that wildfires can occur at any time of year in the Coast Range, including during the winter months. Also, total rainfall for the current season is still well below normal, meaning that we’re potentially entering a third consecutive year of drought unless the rains pick up considerably over the next few months. If this happens, you can anticipate that Level IV restrictions will be re-imposed again next summer, probably at an even earlier date.

Here’s the original post:

You know it’s turning into a really bad wildfire season when this happens. As of July 23, 2013, the Los Padres National Forest is imposing Level IV Fire Restrictions on the entire Forest, including all five ranger districts.

What are Level IV restrictions? Put simply, it means that no wood or charcoal fires of any kind are allowed anywhere in the National Forest, including in designated campgrounds (even if you have your California Campfire Permit). However, gas camping stoves may be used if (1) you’re in a designated Campfire Use Site, and (2) you have a California Campfire Permit. On the other hand, if you’re camping anywhere else in the Forest (i.e., in the backcountry or at an informal site along the road), you can’t have a fire or use your stove. In other words, leave the stove at home and plan on cold meals.

These restrictions may seem pretty draconian, but given the extremely dry conditions in the forest at the moment and the fact that new wildfires are breaking out just about every day, they’re absolutely necessary. Some considerations:

  • While the use of camp stoves is still allowed in official campgrounds, designated backcountry campsites, such as Buckeye Camp on the Trout Creek Trail, are not included.
  • If you’re car-camping at one of the designated Campfire Use Sites, be sure you have your California Campfire Permit if you want to use your stove. The Forest Service is planning to strictly enforce these restrictions, and you can expect that most of the enforcement activity will take place in the popular campgrounds.
  • This order only affects the Los Padres National Forest. If you’re visiting a different national forest, check their website for the current restrictions. The national parks and California State Parks also have their own separate restrictions, so check with them for the latest information. This tip is particularly relevant if you’re going to the Big Sur area, where separate state park and national forest facilities are found in close proximity to each other.
  • Fire restrictions are usually lifted (or relaxed) in the fall after the first significant rain storms have occurred and the danger of wildfire is much lower.

Resources:

Level IV Fire Restrictions Announcement

Forest Order No. 13-05

List of Designated Campfire Use Sites (Complete list of campgrounds and day-use areas where stoves may be used)

InciWeb (The National Interagency Fire Center (NIFC)’s website with information on current wildfires on federal lands)

Posted in News and Commentary | Tagged , , , , , , , , , | 5281 Commenthttps%3A%2F%2Fwww.californiatrekking.com%2Flos-padres-national-forest-implements-level-iv-fire-restrictions%2FLos+Padres+National+Forest+Implements+Level+IV+Fire+Restrictions+%5BUPDATE%3A+Lifted+December+11%2C+2013%5D2013-07-24+19%3A10%3A36California+Trekkinghttp%3A%2F%2Fwww.californiatrekking.com%2F%3Fp%3D528

Falls Trail – Ricketts Glen State Park, Pennsylvania

A visit to northeast Pennsylvania for the ultimate waterfall hiking experience

Today, California Trekking becomes Pennsylvania Trekking to take a brief detour out of California and cover one of the most – if not THE most – spectacular waterfall hike on the East Coast: the Falls Trail in Pennsylvania’s Ricketts Glen State Park. This incredible 7.2 mile route visits a total of 21 named waterfalls, the highest of which is the spectacular 94′ Ganoga Falls. At 13,050 acres, Ricketts Glen is one of the largest and most scenic of Pennsylvania’s State Parks. In addition to a variety of camping, boating, and fishing opportunities, the park has 26 miles of maintained hiking trails. While the Falls Trail is the star attraction of the park, there are plenty of other things to do and trails to hike if you have the time.

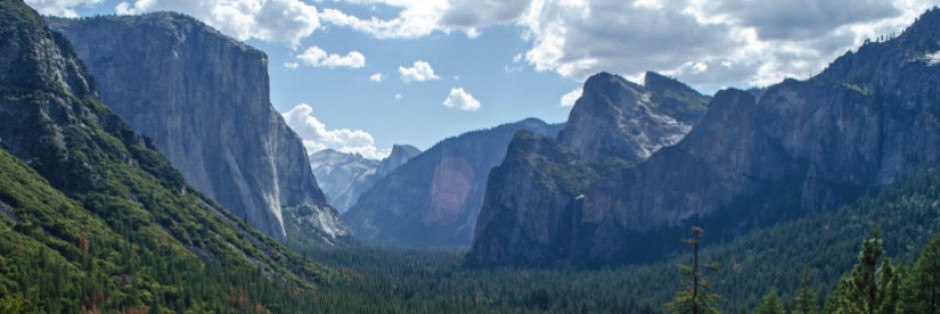
Ricketts Glen was a favorite haunt of mine when I was growing up in Pennsylvania, as I lived less than an hour away and made frequent trips to the park. At the time, I had no idea just how unique the place actually was. While there are plenty of beautiful waterfalls on the East Coast, the Falls Trail is the only place where you’ll be able to visit so many of them in such a short hike. Over the years, I’ve returned time and again to hike the glens and explore the park’s other trails. Don’t come here expecting the jagged peaks and sweeping vistas you’ll find in California and elsewhere in the American West. Here, the mountains are older, lower, and worn down from eons of erosion and glaciation. The fabled hardwood forest that once covered all of the state is still intact here, offering plenty of shade but making scenic vistas few and far between. Instead, Ricketts Glen offers scenic beauty in liquid form – twenty-one separate waterfalls ranging from 11′ to 94′ in height, each one different from the one above it or below it. It’s a waterfall lover’s dream, and a memorable experience for any hiker.

History

Ricketts Glen State Park is named for Robert Bruce Ricketts (1839-1918). Ricketts enlisted in the U.S. Army as a private when the American Civil War broke out in 1861, and rose through the ranks to command an artillery battery during the Battle of Gettysburg. In a meteoric career that would be impossible today, Ricketts left the Army in 1865 when the war ended as a full colonel. Returning to his native northeast Pennsylvania, Ricketts ran a number of businesses and engaged in land speculation, eventually acquiring ownership or control of over 80,000 acres in Sullivan, Columbia, and Luzerne Counties. Ricketts’ holdings became the centerpiece of a huge lumber operation that was very active in this area during the 1890s. Most of the area around Ricketts Glen was extensively logged during this period, and the forest you see today is mostly second-growth – except for pockets of virgin forest along the Falls Trail.

Fishermen discovered the amazing series of waterfalls along Kitchen Creek in 1865. However, hiking into the steep, narrow gorge remained difficult until 1893, when a construction crew hired by Ricketts completed the trail and installed the stone steps that still provide access to the glens today. The trail took four years to complete and is a marvel of human effort, as all the work had to be done by hand due to the terrain in the glens. Throughout the years, the trail has seen many improvements and repairs, as floods occasionally wash down through the glens, destroying bridges and washing away parts of the trail that run close to Kitchen Creek. When I first came here in the 1970s, the bridge at Waters Meet consisted of a fallen tree trunk that had been cut in half had a single wooden guardrail mounted on top. Today’s bridges are constructed entirely of finished lumber. While they don’t have quite the same rustic charm as the old bridges, they’re a lot safer and easier to cross.

By the time Colonel Ricketts died in 1918, the lumber boom had played out, and his heirs began to sell off the land. In the 1920s, 48,000 acres were sold to the Pennsylvania Game Commission, forming the nucleus of the current State Game Lands that surround the park. Ricketts Glen was proposed for national park status in the 1930s, but World War II broke out before the plan could be completed and the area that now comprises the Glens Natural Area was sold to the state in 1942.  Ricketts Glen State Park first opened to the public in 1944. Over the years, additional land purchases have expanded the park to its current 13,050 acres. The Glens Natural Area was designated a National Natural Landmark in 1969. Additional protection came with designation by the Commonwealth of Pennsylvania as a State Park Natural Area in 1993.

Hike summary

Distance: 7.2 miles semi-loop trip

Elevation gain/loss: +1100’/-1100′

Hiking time: 3-4 hours minimum. If possible, allow at least 6 hours to stop and admire the 21 waterfalls along the trail.

Permits and fees: No permit required. Admission to the park is free, but there is a fee for use of the park’s campgrounds and cabins.

Maps: The Ricketts Glen State Park Recreational Guide, published by the Pennsylvania Department of Conservation and Natural Resources (DCNR), is the best map for this hike. Copies of the Guide are usually available for free at the Evergreen Trailhead and at the park’s Visitor Center. The Guide is also available as a series of PDF downloads at the park’s official website, under the MAPS tab. The Ricketts Glen State Park Map covers the entire park, while the Glens Natural Area Enlargement Map covers the Glens Natural Area, including all of the waterfalls on the trail. You’ll need both maps for the entire hike. Alternately, the Red Rock 7.5′ USGS quadrangle also covers the entire trail. However, the individual waterfalls are not shown, and the Falls Trail itself is not accurately depicted.

Best time to go: The Falls Trail is usually accessible from early spring until late fall. In winter, the trail is closed due to icy conditions, although properly equipped ice climbers and mountaineers can still access it. Do not attempt to hike in the glens in winter without crampons and ice ax – you WILL need them. Early spring is “mud season” in the Northeast, and while the trail is open, it’s also usually even muddier than it is during the rest of the year. Late spring is one of the best times of the year for a visit, as conditions are dry, temperatures are pleasant, and blooming trees and wildflowers make for an idyllic hiking experience. Summer is the most popular time of year to visit the park, but hot, humid conditions and afternoon thunderstorms are common. It’s best to start your hike early in the morning. Fall is also extremely popular, with the spectacular fall foliage accenting the beauty of the waterfalls and making it one of the best times of the year for photography.

Trailhead

Ricketts Glen lies about 25 miles west of Wilkes-Barre, PA on Pennsylvania State Route 118. If you’re coming from the south, exit Interstate 80 near Bloomsburg, PA onto Route 487. Drive north about 35 miles on Route 487 and Route 118 East to reach the park. The Falls Trail begins on the west side of the Kitchen Creek bridge on Route 118. Parking is available at two trailheads in this vicinity. The Evergreen Trailhead is just across the road from the start of the trail, while the Route 118 Trailhead lies on the north side of Route 118, just east of Kitchen Creek. The Route 118 Trailhead has a picnic area and a short connector trail that crosses a bridge over to the east side of Kitchen Creek to reach the main Falls Trail. The Evergreen Trailhead lies next to Adams Falls, a 36′ cascade just below the bridge on Route 118.

Trailhead GPS Coordinates:

     Evergreen Trailhead: N41-17.967, W076-16.476. Elevation 1260′.

    Route 118 Trailhead:   N41-17.992, W076-16.441. Elevation 1270′.

Park maps and other information are available at the kiosk at the Evergreen Trailhead.

Route Description

If you’re beginning this hike from the Evergreen Trailhead, you might want to start by taking the brief side trip down the hill from the parking area to Adams Falls. This lovely 36′ waterfall lies immediately below the Route 118 bridge over Kitchen Creek, and provides a good taste of what you’ll see up in the Glens. Despite its close proximity to the busy highway, Adams Falls is surprisingly quiet and peaceful. For a longer detour, the self-guiding Evergreen Trail continues downstream from Adams Falls for a one-mile semi-loop through old growth hemlock forest along Boston Run. Hikers beginning at the Highway 118 Trailhead will want to follow a short connector trail that crosses Kitchen Creek on  a wooden bridge and joins the main Falls Trail on the west bank of Kitchen Creek.

A kiosk at the Evergreen Trailhead usually has a supply of free park brochures. If you don’t already have a copy, be sure to pick one up. The park brochure has the most accurate, detailed map of the park and comes in handy for identifying all of the waterfalls you’ll see on this hike. Once you’re ready to start hiking, carefully cross Route 118 and find the official start of the Falls Trail on the west bank of Kitchen Creek, just next to the highway bridge. A wide path leads north along the creek, shortly coming to a wooden bridge on your right. This is where the connector trail from the Route 118 Trailhead joins the Falls Trail. Continue north along Kitchen Creek under a canopy of classic hardwood forest.

The first bridge over Kitchen Creek connects the picnic area with the main Falls Trail.

This portion of the Falls Trail follows an old roadbed that runs along Kitchen Creek. The roadbed is wide and the grade is mostly flat, making for an easy start to your adventure. You’ll be walking in a dense hardwood forest for the entire trip. As the trail climbs up into the glens and onto the Allegheny Front, the plant community transitions from Southern Hardwood Forest to Northern Hardwood Forest. Thus, you’ll see a variety of oak, hickory, and tulip trees along this stretch of trail, while at the higher elevations the forest changes to a mix of beech, birch, maple, hemlock and spruce trees. You’ll also pass through rare pockets of old growth forest up in the glens. Here, the steep, rocky terrain prevented the logging operations that removed most of the original forest from the surrounding area. If you’re hiking in the spring, look for blossoming dogwood trees and a variety of wildflowers.

The first mile along Kitchen Creek follows an easy, level path.

On the way up to the first waterfall, you’ll cross a sturdy wooden bridge over to the east bank of Kitchen Creek, and then pass back over to the west bank on another bridge just before reaching a split in the trail. Here you have a choice between following either the Lower Trail or the Upper Trail. Both routes reconnect in about 0.4 miles. The Lower Trail to the right descends to follow very closely along the bank of Kitchen Creek. The trail is narrow and occasionally quite exposed, but provides an intimate look at Kitchen Creek. It’s a good choice when water levels are relatively low and you don’t have small children with you. To your left, the Upper Trail climbs briefly to contour along the hillside on a wide, level path. If water levels in Kitchen Creek are running high or you have small children with you, the Upper Trail is the better choice.

The trail splits into the Upper and Lower Trails – both paths rejoin in 0.4 miles.

The Lower Trail follows right along the edge of Kitchen Creek.

Both the Lower and Upper Trails reunite at the first waterfall in the Glens: 16′ Murray Reynolds Falls. While it’s not particularly high, this waterfall is quite beautiful and provides a taste of what you’ll encounter further up the trail. As  you pass each waterfall, look for small wooden signs identifying the name of the fall. These signs are attached directly to the rock on the opposite side of the creek, usually near the crest of the waterfall. Flooding occasionally washes these signs away, and when I hiked this trail in May 2013, many of them were missing.

Murray Reynolds Falls (36′), the first waterfall on the Falls Trail.

Continue on a gradual climb along Kitchen Creek, passing 36′ Sheldon Reynolds Falls and 27′ Harrison Wright Falls before reaching a major trail junction at Waters Meet. Here, the trails split, with the Ganoga Glen Trail continuing straight up the west bank of Kitchen Creek, while the Glen Leigh Trail crosses a bridge to your right to climb up into Glen Leigh. Waters Meet is the idyllic heart of the Glens Natural Area, with waterfalls visible up both of the glens. For our hike, we’ll climb up Ganoga Glen, then take the Highland Trail over to Glen Leigh, where we’ll descend into Glen Leigh and eventually return to this spot for the final part of our hike.

Sheldon Reynolds Falls (36′).

Harrison Wright Falls (27′).

Kitchen Creek bridge at Waters Meet.

Starting up Ganoga Glen, the trail passes 47′ Erie Falls, 47′ Tuscarora Falls, and 17′ Conestoga Falls. The trail gradually becomes steeper and more narrow as you climb up the glen. Staircases assembled from natural stone help with the ascent of the steeper sections, but lack guardrails of any kind. Water seeps down onto the trail from above, meaning that you are virtually guaranteed to encounter muddy, slippery conditions at any time of year. Continuing your climb up the glen, cross a side stream on a wooden bridge and come to 39′ Mohican Falls. Pass 37′ Delaware Falls and 12′ Seneca Falls before reaching a trail junction on your left. This signed trail connects to the Ganoga View Trail and the Old Beaver Dam Road Trail to the west of Ganoga Glen.

Top of Erie Falls (47′).

Looking up the glen, you will shortly see Ganoga Falls. At 94′, it’s the highest waterfall in the park, and twice as high as any of the other waterfalls. Before climbing to the top of the falls, you’ll want to take an unmarked side path to your right that leads over to the base of the falls. This is where you’ll find the best view of the entire waterfall. Views are limited at the top of the falls, as the trail has to climb above a steep embankment rather than follow along the bank of the stream. Resist the temptation to wander off-trail down the embankment for a better view – this is where many accidents have occurred over the years.

Ganoga Falls (94′).

Continuing uphill, you’ll pass 11′ Cayuga Falls, 13′ Oneida Falls, and 37′ Mohawk Falls before reaching a major trail junction. Here, turn right on the Lake Rose Trail and continue uphill. The trail to the left connects to the Old Beaver Dam Road Trail. The Lake Rose Trail eventually leads up to the Lake Rose Trailhead, a possible alternative start if you want to do a shorter loop and still see most of the park’s waterfalls. After 0.2 miles, turn right onto the Highland Trail for the traverse over to Glen Leigh. The trail here is very different than the one you’ve been on so far. It’s mostly a level walk through the woods. You’ll also notice that it’s much quieter away from the constant roar of the falls back in Ganoga Glen. On your way across the plateau to Glen Leigh, you’ll pass through Midway Crevasse, a narrow passageway through a rock formation of Pocono sandstone.

Midway Crevasse on the Highland Trail.

As you gradually drop into Glen Leigh, you’ll want to continue straight at a signed junction with a shortcut trail that drops down to F. L. Ricketts Falls. The Highland Trail eventually ends at another well-marked trail junction. Turn right here onto the Glen Leigh Trail for the descent into Glen Leigh. The trail to the left leads uphill to the main park campground and is another possible alternate route if you’re camping at the campground.

Junction of Highland and Glen Leigh Trails.

Unlike Ganoga Glen, the trail down through Glen Leigh crosses and re-crosses the stream many times. At each crossing, sturdy wooden bridges provide safe, easy passage and great views downhill into the glen. Some of the bridges pass directly over the crest of the glen’s waterfalls. Glen Leigh is also the steeper of the two glens – something to consider if you’re following the semi-loop in a counterclockwise fashion.

The first of several bridges in Glen Leigh.

The first waterfall you’ll pass in Glen Leigh is 15′ Onondaga Falls, followed shortly by 38′ F. L. Ricketts Falls. 30′ Shawnee Falls are next, then 41′ Huron Falls just below. Continue down the trail into the Glen Leigh gorge, passing 60′ Ozone Falls, 36′ R. B. Ricketts Falls, and 40′ B. Reynolds Falls. By the time you reach the last waterfall in the glen, 15′ Wyandot Falls, you’ll be able to see the bridge at Waters Meet just below you. When you reach Waters Meet, you will have completed the semi-loop of the Falls Trail and passed by all 21 waterfalls. Turn left here and follow the Falls Trail for 1.8 miles back down to the trailhead on Highway 118.

A pool below Onondaga Falls in Glen Leigh.

F. L. Ricketts Falls (38′) in Glen Leigh.

Ozone Falls (60′) in Glen Leigh.

Wyandot Falls (15′), Glen Leigh.

Tips:

  • Both the Evergreen and Route 118 Trailheads offer paved parking and restrooms. The Route 118 Trailhead also has a picnic area with tables and charcoal grills.
  • The trail through the glens includes steep, narrow sections with stone staircases. However, there are no guardrails. Springs and seeps above the trail make for persistent wet, muddy conditions even if it hasn’t rained recently. Exercise caution on these parts of the trail and near the numerous steep drop-offs adjacent to the waterfalls.
  • For the reasons stated above, the Falls Trail is not suitable for small children. While older children should have no problems, parents with toddlers or infants should limit their hike to the section between Highway 118 and Murray Reynolds Falls.

Also in the Area

The vast majority of visitors to Ricketts Glen come to hike the Falls Trail, and it’s undoubtedly the most spectacular hiking opportunity in the park. However, if you want to avoid the crowds and see some of the less-visited parts of the park, there are about 21 miles of other trails available that are well worth the extra time and effort. The Evergreen Trail starts from the same trailhead as the Falls Trail, descending into a lower stretch of Kitchen Creek and passing through one of the largest remaining areas of old growth forest in the park. The Grand View Trail starts on the west side of Route 487 at the top of North Mountain and climbs to a fire lookout and an impressive view of the surrounding countryside. Cherry Run and Mountain Springs Trails run deep into the park’s wilder east side, where you’ll see far fewer people and more wildlife.  The Mountain Springs Trail takes you to Mountain Springs Lake, a man-made reservoir that was the site of an ice-harvesting operation that ran here as recently as 1948, when the advent of modern refrigerators rendered the ice-processing industry obsolete. The park brochure includes brief descriptions of these and other trails in the park, and the park map accurately shows their location.

Camping is available within the park itself, and is probably your best bet if you’re staying in the area for a few days. The park’s campground has 120 tent and trailer campsites, and features hot showers and flush toilets. For a more luxurious stay, ten modern rental cabins are also available. The cabins are fully furnished and include indoor bathroom facilities. The cabins are extremely popular and you’ll want to reserve one well in advance of your visit. Reservations for both the campground and the cabins can be made online at the Pennsylvania DCNR website.

This is a lightly-populated area of the state, and lodging options outside the park are limited. However, the Ricketts Glen Hotel lies just outside the park, only a few minutes from the trailhead on Route 118. “Conveniently located in the middle of nowhere” is their motto, and it’s a great place to eat, drink, or spend the night. Ricketts Glen Hotel features a full-service restaurant serving a variety of American and Italian dishes, and a hotel in the same building. Although the hotel has only six rooms, it’s not hard to get a reservation, as most visitors to the park stay in the campground. Weather permitting, be sure to stop in for a post-hike beer or glass of wine out on their outdoor patio, which overlooks a large beaver pond.

If you want to get the real, north woods Pennsylvania experience, head to one of my favorite places – the Central Park Hotel. It’s about a 15-minute drive west from the Falls Trailhead in the tiny community of Central. Originally an old, Victorian-style hotel, today it functions mostly as a restaurant and bar. Rooms are available upstairs, and are popular with hunters during Pennsylvania’s white-tail deer hunting season starting in late November. The food is good, but it’s the old-style ambiance you’ll remember. As befitting a rustic hunting lodge, the dining room is decorated with a wide variety of stuffed animals from the local area and beyond, including the elusive jackalope (Lepus temperamentalus). They have no website, but you can contact them here:

Central Park Hotel
976 Central Road
Benton, PA 17814
(570) 925-6650

Further information

The Ricketts Glen State Park website, hosted by the Pennsylvania Department of Conservation and Natural Resources (DCNR), should be your first stop in planning your visit. It has a wealth of valuable information about the park, and includes links to trail maps, campground maps, and the reservation website for reserving a campsite or cabin. The park can also be contacted at:

Ricketts Glen State Park
695 State Route 487
Benton, PA 17814
(570) 477-5675

Practically every guidebook to hiking in northeast Pennsylvania includes a description of the Falls Trail, but I’m going to recommend Jeff Mitchell’s Hiking the Endless Mountains as the best overall guide to the park. In addition to the Falls Trail, he offers detailed descriptions of many of the park’s other, often overlooked trails.

If you have an interest in the fascinating history of the rise and fall of the timber and ice-harvesting industries in the area, Charles F. Petrillo’s Ghost Towns of North Mountain is an excellent resource. While the print edition is now out-of-print, you can download a PDF edition at the link provided.

For more information about the natural history of the park, including identification guides to the park’s diverse trees, shrubs, and flowers, the Hiker’s Guide to the Trees, Shrubs, and Vines of Ricketts Glen State Park, by Dr. George P. Chamuris is an excellent resource. Print editions of the guide are available at the park’s visitor center, or you can browse an online version at the above link.

For more photos of this hike, see the complete set on Flickr.

Download file: Falls Trail - Ricketts Glen State Park, Pennsylvania.gpx


Click for weather forecast

Posted in Pennsylvania, Ricketts Glen State Park | Tagged , , , , , , , , , , , | 3773 Commentshttps%3A%2F%2Fwww.californiatrekking.com%2Ffalls-trail-ricketts-glen-state-park-pennsylvania%2FFalls+Trail+-+Ricketts+Glen+State+Park%2C+Pennsylvania2013-07-22+18%3A55%3A03California+Trekkinghttp%3A%2F%2Fwww.californiatrekking.com%2F%3Fp%3D377

Santa Rosa Creek Trail – Fiscalini Ranch Preserve

A delightful creekside stroll in Cambria’s Fiscalini Ranch Preserve

Summer is upon us, and unless you’re fortunate enough to live very near the ocean, it’s hot. Really hot. But, while the interior of California is roasting, it’s still cool and pleasant near the ocean. For a short, but delightful hike near the coast, consider a visit to the Fiscalini Ranch Preserve in the charming seaside village of Cambria. This hike is a generally level stroll along Santa Rosa Creek, passing through a dense riparian corridor, stands of native Monterey pines, and peaceful meadows. While the main trail is only two miles out-and-back, it connects to a network of other trails that lead deeper into the preserve. By extending your hike, you can experience breathtaking ridge-top views of the nearby Pacific Ocean, or even wander right along the coast itself. If you’re staying at a hotel on Moonstone Beach Drive, it’s only a few minutes’ walk to reach the trailhead.

Traveling north along the Pacific coast on Highway 1, Cambria is one of the first places where you start to feel like you’ve left southern California and are now in northern California. The sandy beaches give way to dramatic, rocky shores and the vegetation changes from nearly tree-less coastal scrub to shady forest. The forest in and around Cambria is quite unique, as it contains one of only three stands of native Monterey pine forest in the world. Santa Rosa Creek Trail is one of the most easily-accessible opportunities to visit this unusual and inviting forest.

The trail is very popular with local residents, but doesn’t see much use by the hordes of tourists traveling up and down Highway 1. While you probably won’t enjoy complete solitude, the preserve’s out-of-the-way location and limited trailhead parking mean you’ll probably encounter fewer visitors than at the state park units north of town along Highway 1. Although the trail passes by a number of homes and the noise from the highway is always present, it still has a peaceful, natural feel to it. Although the main Santa Rosa Creek Trail makes a fine hike in itself, I highly recommend extending your hike further into the preserve if you have the time.

History

Today’s Fiscalini Ranch Preserve was originally part of the Rancho Santa Rosa, a Mexican land grant established in 1841. When the land grant was divided up, the Fiscalini family acquired the ranch and raised cattle on it for nearly a century before finally selling the property in 1979. The land passed into the hands of real estate developers, who tried unsuccessfully for twenty years to build a combined residential/commercial development on the property. Their proposals were vigorously opposed by local residents and environmentalists, and in 1999 the property was bought by a coalition of environmental groups and local and state government agencies. Final acquisition of the property was completed in November, 2000.

Until recently, Fiscalini Ranch was known as East-West Ranch, and is still referred to as such in many local hiking guidebooks. The current preserve protects 430 acres of open space and is managed by the Cambria Community Services District, with help from the non-profit Friends of the Fiscalini Ranch Preserve.

Hike summary

Distance: 2.6 miles semi-loop trip (including side trip to Ridge Trail)

Elevation gain/loss: +200’/-200′

Hiking time: 1 hour

Permits and fees: No permits or fees are required to visit Fiscalini Ranch. Parking at most of the preserve’s trailheads is limited.

Maps: Currently, the Fiscalini Ranch Preserve hiking trails map, available from the Friends of Fiscalini Ranch Preserve website, is the most accurate, up-to-date map of the Preserve and its trails. The Cambria 7.5′ USGS topographic map also covers the preserve. However, none of the trails are depicted on the current topo.

Best time to go: Fiscalini Ranch is accessible year-round. Due to its proximity to the ocean, the weather is usually quite mild. Overcast, foggy conditions are common during the summer months, particularly in the mornings. Winters are mild, with cooler weather and frequent rain storms. Late winter and spring are the best times to see wildflowers.

Trailhead

The village of Cambria lies on Highway 1 in northern San Luis Obispo County. If you are coming from the south, turn left onto Windsor Boulevard at its intersection with Highway 1. Pass the intersection with Moonstone Beach Drive on your right, then cross a small bridge over Santa Rosa Creek. At 0.1 miles from Highway 1, the dirt and gravel trailhead parking lot lies on your left, just before the intersection with Heath Lane. Be careful when parking here — a ditch runs between the road and the parking lot.

If you are coming from the north, you can either turn right at the intersection of Windsor Boulevard and Highway 1, or drive down Moonstone Beach Drive, which intersects Windsor Boulevard at its south end. Note that while there are no signs along the road pointing you to the trailhead, the start of the trail itself is well-signed and unmistakable.

Trailhead GPS Coordinates: N35-34.064, W121-06.237. Elevation 23’.

The start of the Santa Rosa Creek Trail is well-signed.

Route Description

At the edge of the gravel parking lot, large trail signs for the Santa Rosa Creek Trail mark the start of your hike. You’ll note from the signs that fishing is restricted here, as Santa Rosa Creek serves as a critical habitat for the endangered steelhead trout, which spawn in the lower reaches of the creek. The trail immediately plunges into a dense, shady riparian corridor. While the trail closely parallels Santa Rosa Creek, the creek itself usually lies out of sight below the trail on your left. Poison oak is prevalent along this stretch, so watch your step!

While you probably won’t see any trout in the creek, one thing you’re sure to notice during the first few minutes of the hike is the unpleasant smell emanating from the nearby sewage treatment plant. Don’t be deterred! The smell disappears completely after you’ve hiked past the plant, and the rest of the trail is quite nice.

The trail climbs and descends while running through a lush riparian forest.

Although generally level, the trail climbs briefly over a small hillside, and then descends to run along the creek through a forest of bay trees and Monterey pines. My family and I were lucky enough to see a great blue heron perched in a tree right along the trail in this area.

A great blue heron standing on one leg next to the trail.

The trail climbs again, and then reaches a rest bench, where it splits into two separate paths. The old, wider path to the right climbs steeply uphill, then descends to rejoin the trail. To the left, a newer and narrower path contours across the slope at a level grade before rejoining the other path after about 200 yards.  This path is recommended if you want to stay closer to the creek.

Bench and trail split – both paths rejoin in about 200 yards.

After the two paths rejoin, the trail then briefly arcs around a fenced-in maintenance facility, and then merges onto an old road bed. Here, the trail reaches a narrow meadow with beautiful views of Fiscalini Ranch’s grasslands to your right. Watch for blackberry patches and horsetail ferns along the trail in this area. The horsetail fern (Equisetum) is a “living fossil,” dating back to the Paleozoic era. Horsetail ferns are unique in the modern plant kingdom, being the only types of plants that reproduce through spores, rather than seeds.

Moss hangs from the oaks and Monterey pines along the trail.

About midway across the meadow, come to another rest bench, this one accompanied by interpretive signs that discuss the preserve’s unique flora and fauna. The trail continues across a wider extension of the meadow, passing unsigned junctions with informal trails on your right that lead steeply uphill into the preserve. Look for the stone foundation of an old cabin along this stretch of trail. You will also pass a signed junction on your right with a maintained trail that links the Santa Rosa Creek Trail with the Ridge Trail at the top of the hill to your right. Just past this junction, the Santa Rosa Creek Trail formally ends at a gate along Highway 1, just south of a bridge over Santa Rosa Creek. There is ample parking in a wide, paved pull-out, and you could use this spot as an alternate trailhead for hikes into the preserve.

A connector path leads uphill to the Ridge Trail.

At this point, you are only one mile from where you started. If you wish, you can return to the trailhead along the same route, for a total distance of 2.0 miles. However, if you have time I highly recommend following the link trail uphill through the Monterey pine forest. At the top of the hill, you’ll intersect the Ridge Trail and break out of the woods to a spectacular view of the Pacific Ocean and most of the preserve. The Ridge Trail bisects the preserve from north to south, and there are a variety of semi-loops you can take that will eventually bring you back downhill to the Santa Rosa Creek Trail that you hiked in on.

The Ridge Trail features sweeping views of the preserve.

For our visit, we backtracked from Highway 1 and took an unsigned path that starts near the rest bench in the large meadow. Although very steep, this informal trail quickly climbs to intersect the Ridge Trail. Heading south along the Ridge Trail, we took another unsigned path that descended back into the woods and then dropped down to the signed junction with the Santa Rosa Creek Trail near Highway 1. This option is about 2.6 miles.


Tips:

  • There are no facilities at the Santa Rosa Creek Trailhead.
  • Santa Rosa Creek Trail is open to hikers, mountain bikers, and equestrians.
  • Fiscalini Ranch Preserve is open every day, but there are no provisions for overnight camping within the preserve.
  • This is an excellent hike for small children due to its short distance, gentle grades, and wide trail bed.
  • Occasional patches of poison oak along the creekside portion of the trail are the only hazard you are likely to encounter.

Also in the Area

For such a relatively small preserve, Fiscalini Ranch has a wide variety of trails. The previously-mentioned Ridge Trail links to our hike and provides access to the interior of the preserve. For an even longer hike, take the connector trail of your choice to the Bluff Trail, which runs along the edge of a bluff overlooking the Pacific Ocean from the south end of the preserve to its north end at Windsor Boulevard.

Although there is no overnight camping in the preserve itself, camping is available at Hearst San Simeon State Park, just north of Cambria on Highway 1. The park features two campgrounds: San Simeon Creek Campground and Washburn Campground. San Simeon Creek Campground is larger, having 115 sites available. The campground lies just east of Highway 1, and some sites are within walking distance of the ocean. Showers are also available at this campground. Further inland, the smaller, more primitive Washburn Campground sits at the top of a hill and offers outstanding views of the park and the Pacific Ocean.

If you would prefer not to camp, Cambria offers a wide variety of hotels, bed-and-breakfast establishments, and vacation rental houses. Many of the hotels lie along Moonstone Beach Drive and feature ocean views. It’s a short walk from Moonstone Beach Drive over to the Santa Rosa Creek Trailhead.

As befitting such a popular tourist destination, Cambria also has a large number of excellent restaurants. One of the best places in town to eat is Robin’s Restaurant, located in the East Village area of town. If you’d prefer to take in a view of the ocean with your meal, Moonstone Beach Bar and Grill is conveniently located on Moonstone Beach Drive.

While the majority of Central Coast wineries are located farther inland, there are a few excellent wineries in the Cambria area for a post-hike glass of wine. The nearest one to the trailhead is Moonstone Cellars, located in the West Village area of downtown Cambria. A personal favorite is Harmony Cellars, located about ten minutes’ driving time south of town on Highway 1, in the tiny community of Harmony (population 18). Harmony Cellars features a lovely, hill-top tasting room and picnic area with great views of the Harmony Valley.

Further information

The Fiscalini Ranch Preserve is managed by the Cambria Community Services District, with assistance from a non-profit organization, the Friends of the Fiscalini Ranch Preserve. Their website is a treasure trove of information about the preserve, its history, and flora and fauna. They also have an excellent PDF map of the preserve’s hiking trails.

Robert Stone’s Day Hikes Around San Luis Obispo covers the Santa Rosa Creek Trail, and many other trails in both the Fiscalini Ranch Preserve and the greater Cambria area. The book’s most recent addition was published in 2006, and still refers to the preserve as East-West Ranch. The Ridge Trail is referred to as the Huntington Trail.

For general travel information about Cambria, both See Cambria California and the Cambria Chamber of Commerce have excellent websites with a tremendous amount of information about the local area and its many attractions.

Download file: Santa Rosa Creek Trail - Fiscalini Ranch Preserve.gpx


Click for weather forecast

Posted in California, Cambria, Fiscalini Ranch Preserve | Tagged , , , , , , , , , , , , , , , , , , | 4399 Commentshttps%3A%2F%2Fwww.californiatrekking.com%2Fsanta-rosa-creek-trail-fiscalini-ranch-preserve%2FSanta+Rosa+Creek+Trail+-+Fiscalini+Ranch+Preserve2013-07-02+20%3A36%3A31California+Trekkinghttp%3A%2F%2Fwww.californiatrekking.com%2F%3Fp%3D439

Rinconada Trail – Los Padres National Forest (Santa Lucia Ranger District)

A pastoral Central Coast hike with sweeping views and historic mining ruins

San Luis Obispo County offers a wonderful variety of hiking opportunities, both near the coast and farther inland. While the county’s numerous coastal parks generally teem with visitors, the interior “backcountry” region sees relatively light use by hikers. The Santa Lucia Ranger District of the Los Padres National Forest provides a bountiful supply of public land, including three designated wilderness areas and many miles of hiking trails. However, private property inholdings and a network of rough, unpaved roads conspire to make access to many of the area’s trails challenging.

A notable exception is the Rinconada Trail, located just off Pozo Road between Santa Margarita and the tiny community of Pozo. The Rinconada Trailhead is one of the few trailheads in the Santa Lucia Ranger District that can be accessed via a paved road. This allows the trail to remain open year-round, including during the winter months when wet, muddy conditions usually force the closure of the district’s network of unpaved roads. While the five-mile semi-loop hike described here makes a fine outing in itself, the Rinconada Trail also serves as an important access route into the adjacent Santa Lucia Wilderness. As an added bonus, a short side trip from the trailhead visits the nearby Rinconada Mine, an abandoned mercury mine and processing mill that dates back to 1872.

History

Cinnabar, the mineral from which mercury is derived, was first discovered at the site of the Rinconada Mine in 1872. A mine and processing facility to convert the cinnabar ore into mercury were established on the site, which operated intermittently for almost 90 years, finally closing in 1961. While the Rinconada Trail lies on the Santa Lucia Ranger District of the Los Padres National Forest, the mine site itself is administered by the Bureau of Land Management (BLM).  From 2003-2004, the site and the adjacent Rinconada Trail were closed to public access while the U.S. Environmental Protection Agency (EPA) conducted a thorough environmental clean-up of the mine site. The trail re-opened to the public in 2005.

It should be noted that while the Rinconada Trail is named for the nearby mine, the trail as currently laid out was constructed to circumvent the mine site. The current trail stays east of the mine site, then re-connects with the original road from the trailhead after about a mile. Be alert for ‘TRAIL’ signs along the way that steer you away from the mine site.

Although beyond the scope of this post, hikes on the Rinconada Trail can be extended into the Santa Lucia Wilderness, which lies south of Hi Mountain Road. This wilderness area, established in 1978, now consists of 20,486 acres of national forest and BLM land. From the end of the Rinconada Trail on Hi Mountain Road, it is possible to access Little Falls and Big Falls Canyons. Wilderness permits are not required for visits to the Santa Lucia Wilderness.

Hike summary

Distance: 4.8 miles semi-loop trip

Elevation gain/loss: +1200’/-1200′

Hiking time: About 2-3 hours

Permits and fees: No Adventure Pass is required to park at the Rinconada Trailhead. Likewise, if you extend your hike into the Santa Lucia Wilderness, a wilderness permit is not required. However, you will need a California Campfire Permit if you plan to build a fire or use a camping stove during your visit.

Maps: The Santa Margarita Lake 7.5′ USGS topographic map provides the best coverage for this hike. Note that the first 0.5 miles of the trail have been re-routed slightly east of the path shown on the topo in order to avoid the maze of use paths and mining prospects that lie above the Rinconada Mine.

Best time to go: The Rinconada Trail is generally accessible year-round. November-April is usually the best time to visit due to cooler weather and a vibrant spring wildflower display that normally peaks in March. As with most trails on the Los Padres, winter rains bring very muddy conditions which can last for several days after the rain itself has stopped. From May through October, the weather is usually dry and very hot, with daytime highs frequently in the 90s or even higher. Most of the route is unshaded, which only adds to the misery during this time of year. However, the Rinconada Trail is short enough that it can still be a pleasant experience during the summer if you start your hike as early in the morning as possible. Be sure to abide by any seasonal fire restrictions which may be in effect during your visit, particularly during the summer.

Trailhead

From Highway 101 just north of San Luis Obispo (at the top of the Cuesta Grade), exit onto Highway 58 East. Continue through the small town of Santa Margarita, following signs to stay on Highway 58. Once out of town, you will reach an intersection where Highway 58 turns left. Continue straight at this intersection, now on Pozo Road. Follow Pozo Road for 9.4 miles to the signed turn-off for the Rinconada Trailhead on your right. A short driveway leads up to a large gravel parking lot. The trail starts on the left (east) side of the parking lot. On the right (west) side of the parking lot is the start of the short side trip to the Rinconada Mine.

Trailhead GPS Coordinates: N35-17.396, W120-28.490. Elevation 1740′.

The Rinconada Trail starts at a gate at the west end of the parking lot.

Route Description

Park in the large gravel parking lot described above. The start of the Rinconada Trail will be to your left as you enter the lot, at an information sign board. On the right side of the parking lot, a vehicle gate marks the start of the short side trip over to the Rinconada Mine. The trail starts as a well-graded singletrack through pleasant, shady oak woodland. Enjoy the shade now, as there will be very little of it later on.

Trail mileage sign for Rinconada Trail

The trail passes a hitching post for equestrians and two small, seasonal seeps. A metal trail sign indicates two miles to Little Falls and five miles to Big Falls. These distances are to the start of the Little Falls Trail and Big Falls Trail respectively, not the waterfalls themselves! The first mile of the trail is perhaps one of the most pleasant stretches along the route, especially in springtime when the meadows are green with a fresh crop of grass and the wildflowers are in full bloom. This section of the trail was constructed to avoid the Rinconada Mine. The trail occasionally intersects old mining roads that lead back over to the mine, but ‘TRAIL’ signs will keep you on the correct route.

TRAIL signs keep you on the correct route while avoiding the mine.

After about a mile of easy hiking, the trail rejoins the original road that used to lead up to mining prospects on the north slope of Bell Mountain (peak 2618′ on the topo map). Once on the old road, the grade steepens considerably and you climb south, shortly emerging into the open. The stretch of trail from here to the top of the ridge consists of a steep, shade-less climb through high chaparral. Although it can be unpleasant during hot weather, the views of the surrounding countryside improve continuously as you climb toward the top of the ridge. Bell Mountain is immediately visible to the southwest, its reddish rock outcroppings surrounded by a sea of chaparral and a few scattered grey pines. Be sure to stop occasionally and admire the view to the north, where broad Pozo Valley spreads out before you.

The first mile of trail passes through delightful grassy meadows and oak woodlands.

The old road continues on a climbing traverse of the east side of Bell Mountain, aiming for a saddle to the east of the summit. Soon, you will reach a cattle gate across the trail. This gate is usually closed, but a hiker pass-through allows easy passage. Just beyond the gate, the trail climbs on the right side of a sloping grassy meadow and shortly reaches a broad saddle on a ridge, 1.4 miles from the start of your hike. At the crest of the ridge, excellent views of the Santa Lucia Wilderness open up to the south. This grassy meadow makes an excellent place to rest or enjoy lunch. Although unsigned, it’s also an important junction. The main Rinconada Trail continues (somewhat vaguely) over the saddle and begins a steep, rocky descent down to its end at a junction with Hi Mountain Road. This is the shortest route down to the Little Falls and Big Falls Trails, and you should head this way if you’re bound for either destination.

Pass through a cattle gate shortly before reaching a saddle on the crest of the ridge.

Cattle frequently graze in the meadow below the saddle.

However, if you’re following the route described here, you’ll want to turn left onto an abandoned and unsigned road that leads east along the ridge. You will eventually return to this spot, coming back up the Rinconada Trail from Hi Mountain Road. This road descends, briefly climbs, and then descends again through light oak woodland, eventually ending at a junction with Hi Mountain Road. Along the way, it passes a fire ring at an unofficial dry campsite beneath a gnarled, ancient oak tree. If you camp here, be sure you have your California Campfire Permit.

For the semi-loop, turn left onto this old road at the saddle.

Fire ring and oak tree at the dry campsite.

At the junction with Hi Mountain Road, turn right onto the road and follow it west along a gradually descending traverse with excellent views south into the Santa Lucia Wilderness. Be alert for automobiles on this stretch of the route, as Hi Mountain Road is usually open to vehicular traffic. Due to its very rough condition, the road is lightly used. Before reaching the junction with the Rinconada Trail, you will pass Little Falls Spring, on your right. While there is a large concrete water tank here, the spring itself lies in a brushy gully. While you MIGHT be able to get water here, it’s certainly better to carry an adequate supply from the trailhead. The spring is intermittent, and extensive cattle grazing in the area make the water quality questionable.

Hi Mountain Road offers stunning views into the Santa Lucia Wilderness.

Beyond Little Falls Spring, you will reach the junction with the Rinconada Trail after about a mile of walking along Hi Mountain Road. This junction marks the end of the Rinconada Trail and is your return route. However, before turning to climb back up the Rinconada Trail, continue about 100 yards west along Hi Mountain Road to reach the signed upper terminus of the Little Falls Trail. This trail leads south into the Santa Lucia Wilderness to Little Falls, nestled deep in Little Falls Canyon. There are more excellent views to the south and west into the Santa Lucia Wilderness here. Hikers bound for Big Falls will want to continue west along Hi Mountain Road for approximately 1.5 miles to reach the upper end of the Big Falls Trail.

The upper trailhead for the Little Falls Trail on Hi Mountain Road.

For those following our main semi-loop route, backtrack along Hi Mountain Road to the Rinconada Trail junction. The trail heads north from here, climbing gradually at first. However, it soon re-connects with an old mine road and reaches what is undoubtedly the most unpleasant part of the hike – a steep climb straight up the hillside through a shallow, rock-filled gully. There is no shade and there are no switchbacks between here and the top of the ridge. However, the climb is very brief and soon you will be back at the grassy saddle and trail junction where you started your loop.

A steep, unshaded old mine road takes you back up to the saddle.

After catching your breath and perhaps taking a break in the shade of the solitary oak tree near the trail junction, pick up the Rinconada Trail as it descends north back to the trailhead. The descent back to your waiting vehicle is certainly more pleasant than the initial climb to get up here, although it might also be a lot hotter if you started your hike early in the morning.

Side trip to Rinconada Mine

Either before or after your main hike on the Rinconada Trail, you may wish to visit the nearby Rinconada Mine. The trail to the mine starts at the west end of the trailhead parking lot at a vehicle gate. The trail contours along an old mine road through a shady woodland to reach the mine’s processing mill in about 0.25 miles. Although the mine has been cleared of hazardous materials and closure orders for the site have been lifted, it is still extremely important to observe all basic safety precautions when visiting the mine. The large concrete pad in front of the mill ends in a steep drop-off that has no guard railing. Also, the hillside behind the mill is littered with tunnels and adits that lead into the actual mine itself. Most of these entrances have been sealed off to protect the curious public.

On a personal note, I did not find the mine to be very appealing. While its historical value is significant, it appeared to me to have degenerated into a rusted, graffiti-covered eyesore. The mine seems to be popular with local party-goers and target shooters, who have left it littered with trash and spent shells. Although the mine was the subject of a thorough EPA clean-up, a strong, unpleasant chemical smell pervades the area around the mill. Nonetheless, it’s worth taking a brief look at due to its proximity to the trailhead. It’s not a good place to take small children, however.

The abandoned mercury processing mill at the Rinconada Mine.

Rusting pipes and machinery at the Rinconada Mine.

Tips:

  • The Rinconada Trailhead has ample parking, but no other facilities.
  • The Rinconada Trail is open to hikers, mountain bikers, and equestrians. A portion of the route follows Hi Mountain Road, which is usually open to vehicles. Mountain bikers can follow the semi-loop route described here, but are not allowed in the Santa Lucia Wilderness.
  • There are no designated trail camps along the route. However, there is a fire ring at a dry campsite on the connector path between the main Rinconada Trail and Hi Mountain Road.
  • Be sure to bring adequate water. Water is sometimes available at Little Falls Spring, but it is seasonal and usually dry during the summer and fall months.
  • Poison oak is EVERYWHERE along the first mile of the trail up to the cattle gate. As with any hike in the Central Coast, ticks and rattlesnakes are also potential hazards.
  • Cattle frequently graze in this area and you’re likely to encounter them along the trail. Be sure to keep a safe distance.
  • The Rinconada Trail is generally suitable for children old enough to walk the entire hike, although you’ll want to keep them away from the poison oak on the lower stretch of the trail. The side trip to the Rinconada Mine, however, is NOT RECOMMENDED for small children due to the numerous hazards at the mine site.

Also in the Area

There are a variety of other hiking opportunities in this area. As noted above, the Rinconada Trail can be used as part of an extended hike into the Santa Lucia Wilderness, with Little Falls and Big Falls being popular destinations. Further east, the Trout Creek Trail leads into the Garcia Wilderness from a trailhead off Hi Mountain Road. Santa Margarita Lake, off Pozo Road, offers a variety of hiking trails in addition to camping, picnicking, boating, and other recreation opportunities.

Camping is also available at the Santa Margarita Lake KOA, located just before you reach the entrance to Santa Margarita Lake Park on Santa Margarita Lake Road. In addition to tent and RV camping, the KOA also offers small cabins and yurts.

If you’re looking for a great post-hike meal and steak sounds particularly appealing, The Range in downtown Santa Margarita is highly recommended as the best restaurant in town. OK, it’s just about the ONLY full-service restaurant in town, but the reviews are pretty unanimous that it’s a great place to eat. Just be sure to bring cash or make a stop at the nearby ATM – they don’t take credit cards. Also located in beautiful downtown Santa Margarita are not one, but two excellent wineries to choose from if you’re in need of a glass of wine to celebrate your day of hiking. While the Ancient Peaks Winery is larger and more well-known, you should also consider a visit to Pozo Valley Vineyards, a small, family-run winery that’s also on El Camino Real (Highway 58) and offers complimentary tasting.

Further information

The Rinconada Trail and the Santa Lucia Wilderness are managed by the Santa Lucia Ranger District of the Los Padres National Forest. The Los Padres website offers a wide variety of general information about the Forest. Be sure to check the road conditions and closures web page before your hike, especially in the winter. If you need additional information or the website hasn’t been updated recently, call or stop by the Santa Lucia Ranger District Office for the latest updates:

Santa Lucia Ranger District
1616 North Carlotti Drive
Santa Maria, CA 93454
Phone: (805) 925-9538

Hours: 8:00am – 4:30pm Monday – Friday


While the Rinconada Trail is mentioned in all of the currently available hiking guidebooks that cover San Luis Obispo County, Top Trails: California Central Coast: Must-Do Hikes for Everyone, published by Wilderness Press, has the most accurate, up-to-date information available.

Additional information about the Rinconada Mine and the environmental clean-up that was performed there can be found on the BLM’s website.

More photos of this hike are on Flickr.

Download file: Rinconada Trail - Los Padres National Forest.gpx


Click for weather forecast


Posted in Los Padres National Forest, Santa Lucia Ranger District | Tagged , , , , , , | 1478 Commentshttps%3A%2F%2Fwww.californiatrekking.com%2Frinconada-trail-los-padres-national-forest-santa-lucia-ranger-district%2FRinconada+Trail+-+Los+Padres+National+Forest+%28Santa+Lucia+Ranger+District%292013-06-23+18%3A28%3A52California+Trekkinghttp%3A%2F%2Fwww.californiatrekking.com%2F%3Fp%3D147

Book review: Hiking and Backpacking Santa Barbara & Ventura, by Craig R. Carey

The Los Padres National Forest stretches along California’s Coast Range from just south of Carmel at its northern end to just west of Interstate 5 near Castaic at its southern end.  The forest consists of two separate regions: the northern portion (the Monterey Ranger District) lies almost entirely in Monterey County, while the southern portion (the Santa Lucia, Santa Barbara, Ojai, and Mount Piños Ranger Districts) runs across San Luis Obispo, Santa Barbara, Ventura, and Kern Counties. The “heart” of the forest – and also the area containing the most acres of protected wilderness – occupies the northern reaches of Santa Barbara and Ventura Counties, forming a sprawling backcountry region that is still easily accessible to Southern and Central California residents.

Until quite recently, the only truly thorough hiking guide to this region was Dennis Gagnon’s Hiking the Santa Barbara Backcountry, a popular guide that covered most of the trails and backcountry camps in the Santa Barbara and Ventura County portions of the forest. Unfortunately, this guidebook was last published in 1991 and has been both out-of-print and out-of-date for some time.

Luckily for visitors to this area, Craig Carey has come to the rescue with a brand-new, up-to-date guidebook, Hiking & Backpacking Santa Barbara and Ventura.  This new guide, first published in 2012 by Wilderness Press, covers just about every trail, trailhead, and trail camp in the Santa Barbara, Ojai, and Mount Piños Ranger Districts of the Los Padres. Ninety-six hikes are included, all with highly detailed information about not only the trails themselves, but also the fascinating geology and history (both natural and human) of the area.  As befitting a 21st Century hiking guidebook, each hike includes GPS coordinates for every major point of interest along the route.  These coordinates are particularly valuable, as the effects of massive wildfires in recent years and sporadic trail maintenance have made navigation particularly challenging on many of the more remote backcountry trails. NOTE: GPS coordinates are given in UTM format, which is ideally suited for manually plotting your location on a paper map. If you plan to use the coordinates listed for a hike, either set your GPS receiver to the UTM format or convert the coordinates to the latitude/longitude format using your favorite mapping software.

While maps are included for all of the hikes, they are generally not suitable for use out on the trail, and are intended as a general overview only.  Fortunately, Carey provides information about several commercially-produced maps for the area, including excellent maps by Tom Harrison Maps and Bryan Conant. The Harrison map covers the Sespe Wilderness, while Conant offers separate maps of the San Rafael Wilderness and the Dick Smith & Matilija Wildernesses. Both the Harrison and Conant maps are also available on Amazon.  For users of the traditional USGS topographic maps (paper or electronic versions), Carey points out and corrects known errors in the most recent versions of the quadrangles covered in the book’s hikes. Most of these errors involve the location of obscure trail camps – a good thing to know when you’re deep in the backcountry, looking for a place to camp after a long day of hiking.

One notable omission is the exclusion of coverage of the southern portion of the Santa Lucia Ranger District. Because of this, only the very southernmost corner of the San Rafael Wilderness is covered in the book. Popular destinations such as Manzana Schoolhouse and the Sisquoc River are left out. Old heads who still have a copy of Gagnon’s guide would do well not to throw it out just yet. Hopefully, a later edition will be expanded to include full coverage of the San Rafael Wilderness.

In addition to the 406-page print edition, an e-book version is also available on the Kindle. Wilderness Press has recently begun to release Kindle editions of their guidebooks, and the sheer size (and weight) of the physical book makes a digital version particularly useful for both pre-trip planning and in the field. While most hikers won’t want to lug their Kindle along on the trail, the Kindle apps for iOS, Android, and other smartphones and tablets allow quick offline access to the entire guidebook while hiking. This eliminates the need to carry a physical book. Of course, you’ll still want to bring a paper map for your intended hike, and maybe a printout of the route description, in case of battery failure.

All in all, Carey’s book is an “instant classic.” Wilderness Press has been setting the gold standard for hiking guidebooks since 1967, and Hiking & Backpacking Santa Barbara & Ventura continues that tradition with extremely detailed route descriptions and copious supplemental information about the area. Be sure to visit the author’s website for additional information about the book and the Santa Barbara/Ventura backcountry.

UPDATE: In 2014, Wilderness Press published an revised second printing of Hiking & Backpacking Santa Barbara & Ventura which includes numerous updates and corrections to the original printing. If you have a copy of the original 1st Edition printing, you can find a list of errata here. Rumor has it that an expanded 2nd Edition is in the works — one that will cover even more of this remarkable slice of Southern California backcountry.


Posted in Hiking guidebooks, Mount Piños Ranger District, Ojai Ranger District, Reviews, Santa Barbara Ranger District | Tagged , , , , , , , , , , , , , , , | 1792 Commentshttps%3A%2F%2Fwww.californiatrekking.com%2Fbook-review-hiking-and-backpacking-santa-barbara-ventura-by-craig-r-carey%2FBook+review%3A+Hiking+and+Backpacking+Santa+Barbara+%26+Ventura%2C+by+Craig+R.+Carey2013-04-20+00%3A06%3A54California+Trekkinghttp%3A%2F%2Fwww.californiatrekking.com%2F%3Fp%3D179

Mount Whitney May Be Higher (or Lower) Than You Thought

Everyone knows that California’s Mount Whitney is the highest peak in the continental United States, but exactly how high is it? Official measurements have ranged from a “low” of 14,494 feet above sea level to as high as 14,505 feet. Not that this will make much of a difference when you’re taking the last few steps to the summit… and likely gasping for air as you do.

Ever since the peak was first climbed in 1873, geologists and surveyors have attempted to precisely determine the actual elevation of the summit. When construction of the 211-mile John Muir Trail was completed in 1930, a plaque was bolted on a rock near the summit, identifying the peak’s elevation as 14,496.811 feet above sea level. The plaque remains on the summit to this day, and while the elevation figure is precise, it is no longer considered accurate.

When I climbed the peak (twice) in the 1990s, the 14,494′ elevation was the “official” figure in general use. Since then, advances in surveying and the advent of using the satellite-based global positioning system (GPS) to determine elevation have resulted in a generally-accepted figure of 14,505′. However, a recent article in The Bakersfield Californian indicates that there is still some controversy regarding the actual height of the mountain. Adding to the confusion, geologists generally agree that, due to plate tectonics, the mountain is gradually rising in elevation.

For more information on the highest point in Inyo and Tulare Counties, the Sierra Nevada, the State of California, and the continental US, check out Mount Whitney.com.

Source: Height of lower 48 states’ tallest peak still up in the air

Posted in News and Commentary | Tagged , , , , , , , | 3212 Commentshttps%3A%2F%2Fwww.californiatrekking.com%2Fmount-whitney-may-be-higher-or-lower-than-you-thought%2FMount+Whitney+May+Be+Higher+%28or+Lower%29+Than+You+Thought2013-04-18+21%3A27%3A53California+Trekkinghttp%3A%2F%2Fwww.californiatrekking.com%2F%3Fp%3D321

Trout Creek Trail – Garcia Wilderness

Sublime creekside hiking on a little-used trail in the California Central Coast’s Garcia Wilderness

Looking for a pleasant way to enjoy the beautiful spring weather? The Trout Creek Trail provides an excellent day hiking opportunity on a very lightly-used trail in the Los Padres National Forest near Santa Margarita, California. While navigating the unpaved road to the trailhead and finding the unmarked trailhead can prove challenging, the trail itself more than makes up for this. Pastoral oak woodlands, gurgling streams, wildflowers, and a lovely, remote trail camp – it’s all here. You can also expect lots of solitude on what is probably one of the best-kept secret trails in San Luis Obispo County. While the route presented here makes a nice dayhike, it’s also possible to backpack the trail, camping at Buckeye Camp or continuing deeper into the Garcia Wilderness.

The route to Buckeye Camp in the Garcia Wilderness follows the Trout Creek and Buckeye Camps Trails, first paralleling Trout Creek and then following a climbing traverse along the south slopes of Garcia Mountain to Buckeye Camp. The route crosses a mix of national forest land and private inholdings for the first 2.4 miles before entering the designated wilderness area. The trail crosses Trout Creek nine times, although none of these crossings normally require a wet ford. Buckeye Camp is one of only two designated trail camps in the Garcia Wilderness.

History

The Garcia Wilderness protects 14,100 acres in the northern portion of the Santa Lucia Ranger District of the Los Padres National Forest. Established in 1992 by the Los Padres Condor Range and River Protection Act, the wilderness is located just south of the tiny community of Pozo, deep in the interior of San Luis Obispo County. The wilderness lies between the Santa Lucia Wilderness to the west and the Machesna Mountain Wilderness to the east.

The wilderness encompasses a variety of plant communities, including grasslands, chaparral, oak woodland, and riparian vegetation. Elevations range from a low of 1120’ along Stony Creek to 3100’ on the summit of Garcia Mountain.

Trout Creek Trail is also a segment of the proposed Condor Trail, a 400-mile route through all five ranger districts of the Los Padres National Forest. The trail begins near Lake Piru in Ventura County, and proceeds generally north across the Los Padres National Forest and adjacent lands all the way to Bottchers Gap, on the north side of the Ventana Wilderness in Monterey County. Trout Creek Trail will be a very important section of the Condor Trail, providing a route across the Garcia Wilderness and linking the trail to Hi Mountain Road. The trail will also allow reliable access to fresh water and a pleasant overnight camp for backpackers at Buckeye Camp.  The Condor Trail Association has an excellent website with maps, photographs, and information about the trail. Check it out and see how you can get involved in helping to make this dream a reality!

Hike summary

Distance: 7.8 miles round trip

Elevation gain/loss: +1300’/-1300′

Hiking time: About 4-5 hours

Permits and fees:  No Adventure Pass is required to park at the undeveloped Trout Creek Trailhead. Likewise, wilderness permits are not required for access to the Garcia Wilderness. You will need a California Campfire Permit if you plan to build a fire or use a camping stove at Buckeye Camp.

Maps:  Santa Margarita Lake, Pozo Summit, Caldwell Mesa, and Tar Spring Ridge 7.5’ USGS topos cover this trail and provide the best level of detail. Note that the Trout Creek Trailhead is not accurately located on the Santa Margarita Lake quad (1995 version). The actual trailhead is approximately 0.1 miles northwest of the location shown on the map. Likewise, Buckeye Camp is inaccurately located on the Caldwell Mesa quad (1995 version), being about 0.15 miles northeast of the location shown on the quad. You will also want a copy of the current Los Padres National Forest (Monterey and Santa Lucia Ranger Districts) map for driving the roads in this area. This map is not suitable for use on the trail, but provides an excellent overview of the roads and facilities in the area.

Best time to go: March through early May is generally the best time to visit. Temperatures are pleasant and spring wildflowers are at their peak. The trail is also accessible in the summer and fall, but high temperatures and extremely dry conditions make this a less-than-desirable time to go. Plan to hike early in the morning if you go during this time of year, and bring plenty of water. Winter brings cooler temperatures, but the Hi Mountain Road is usually closed due to muddy conditions from about November – February. Always confirm that the road is open before attempting this hike. Hi Mountain Road is maintained by San Luis Obispo County, which lists road restrictions for Hi Mountain Road and other roads within the county on their SLO County Road Restrictions web page. Road closures are also found on the Los Padres National Forest website, or you can call the Santa Lucia Ranger District Office in Santa Maria at (805) 925-9538.

This cattle gate in a clearing IS the trailhead.

Trailhead

From Highway 101 just north of San Luis Obispo (at the top of the Cuesta Grade), exit onto Highway 58 East. Continue through the small town of Santa Margarita, following signs to stay on Highway 58. Once out of town, you will reach an intersection where Highway 58 turns left. Continue straight at this intersection, now on Pozo Road. Follow Pozo Road for 15.8 miles to the tiny community of Pozo, California. Turn right onto Hi Mountain Lookout Road (Forest Service road 30S05) just before reaching the Pozo Guard Station on your right. The road almost immediately passes through a gate and turns to dirt. Carefully follow this road past several private ranches and onto the national forest, crossing the Salinas River at a ford and slowly climbing into the mountains. At 3.6 miles from Pozo Road, pass an intersection with the road to the Hi Mountain Condor Lookout on your right and the start of the Garcia Ridge OHV Trail on your left. Continue 1.2 miles to the trailhead, which is just beyond a ford of Trout Creek. There are no signs marking the trailhead. Look for a short dirt driveway on your left and a small clearing with a fence and cattle gate. The trail starts at the cattle gate.

The trailhead can also be reached from the coast from Arroyo Grande. From Highway 101, exit onto Grand Avenue (Highway 227). Turn left onto Highway 227, signed for Lopez Lake. After 1.0 miles, turn right onto Huasna Road, again signed for Lopez Lake. Continue straight at 1.2 miles, where Huasna Road becomes Lopez Drive. Continue a further 8.1 miles, then turn right onto Hi Mountain Road. At 6.2 miles, the pavement ends, and Hi Mountain Road continues as an increasingly rough dirt road for an additional 5.3 miles to the trailhead on the right.

Trailhead GPS Coordinates:  N35-15.468, W120-23.658.  Elevation 1500’.

Pass through the hiker stile to start on the Trout Creek Trail.

Route Description

Found the trailhead? Congratulations! It’s certainly obscure, but not too difficult to locate. Road and trail conditions on the Los Padres National Forest are a stark contrast with the paved trailheads, large informative signs, and occasional clean restrooms found at most of the state and local parks in the Central Coast region. However, this also has a distinct advantage: solitude. You are far more likely to have the trail to yourself here, and consequently you’re more likely to see some of the area’s abundant wildlife. On a spring weekend visit, I encountered only one other group of people, and they had come in from the opposite side of the wilderness area. I also saw a blue heron flying down over the Salinas River on the drive in, and two wild turkeys were making quite a racket near the trailhead. Be on the lookout for other common animals, such as mule deer and bobcats. Black bears also inhabit the area, but you’re not likely to see them during the day. This is also prime rattlesnake country, although fortunately I didn’t see any during my hike.

While there are presently no signs marking either the trailhead or the Trout Creek Trail, the route is obvious. A cattle gate in the trailhead clearing marks the start of the trail. At the gate, a narrow hiker’s stile allows access to the trail itself. Be careful not to get caught on the barbed wire! Once through the stile, the Trout Creek Trail is clear and obvious. Briefly parallel Hi Mountain Road before dropping down to the first of nine crossings of Trout Creek in a small meadow. This and all subsequent crossings of Trout Creek can usually be accomplished by rock-hopping. Water levels will rarely be high enough to require getting your feet wet, although it is possible after an unusually wet winter.

The first of nine crossings of Trout Creek is in a small meadow.

The portion of the trail along Trout Creek is quite pleasant, being generally level and offering frequent shade. Riparian vegetation is predominant along the creek. Unfortunately, the vegetation also includes a lot of poison oak. Poison oak is arguably the most common plant species in California, and in the central coast ranges it is everywhere. An unusual sight along this part of the route is a cluster of prickly pear cactus growing in a flat meadow along Trout Creek. This area may have been a homestead at one time.

Prickly pear cactus grows along the trail in a flat meadow above Trout Creek.

After the final crossing of Trout Creek, the trail descends to a junction with the Buckeye Camp Trail. The only sign marking the junction is a simple carsonite post. However, the junction is hard to miss as a cow skull has been placed to mark the location. Here, we turn left on the Buckeye Camp Trail and begin the first real climb of the route. While the main Trout Creek trail continues straight, it ends in about 0.5 miles at a private property boundary. On the Buckeye Camp Trail, climb steeply up a hill, entering the Garcia Wilderness. The wilderness boundary is not marked here, but a fallen trail sign marked ‘Trout Creek Trail’ lies next to the trail about where the boundary is located. Continue up hill, cresting a ridge in a pleasant oak woodland. Here we start to get out first good views of the surrounding countryside. From the ridge crest, the trail continues uphill to a prominent saddle, located about 3.25 miles from the trailhead. Here, Caldwell Mesa and Pine Ridge are visible on the horizon to the southeast.

“Turn left at the cow skull…”

Prickly Phlox, one of many species of wildflowers that bloom along the trail in the spring.

A brief descent from the saddle leads into and back out of a narrow ravine. The trail continues to another junction. Look carefully, as the junction is only marked by two small wooden signs lying on the ground. A burnt, hand-carved ‘Camp’ sign points left toward Buckeye Camp. The main trail, signed ‘Campground,’ continues to the right. This route leads down to a junction with the American Canyon Trail, which accesses the Garcia Wilderness from the north. On the lateral trail, a brief climb of about 0.1 miles leads to Buckeye Camp, nestled on a well-shaded flat beside a spring-fed tributary of Trout Creek. The camp has a single fire ring with a metal grate and several benches. A wilderness toilet is located just below the camp, but dense poison oak made it difficult to access. While there are no buckeyes here, there are plenty of oaks and a few bay trees. Buckeye Camp makes an excellent place for lunch, or a fine overnight camp. Once you’ve had your fill, retrace your steps back to the trailhead on the same route. The return trip is mostly downhill, and the grade climbing back up along Trout Creek is nearly imperceptible.

This burnt ‘camp’ sign marks the way to Buckeye Camp.

Buckeye Camp is small, but makes a nice camping spot.

Tips:

  • Trout Creek Trailhead has ample parking, but no other facilities.
  • Watch for barbed wire fencing along the trail. The route crosses in and out of a private inholding before entering the wilderness area. While the cattle gates along the trail have been removed, some fencing still remains.
  • Poison oak is abundant along the entire route, especially in the springtime.
  • This hike is suitable for older children, but due to the prevalence of poison oak along the trail and several steep drop-offs, I would not recommend it for toddlers.

Also in the Area

Buckeye Camp can also be reached from the northeast by trail #16E05, which starts from the American Canyon Trailhead on Avenales Road. This hike is a strenuous, 13.0 mile out-and-back trip. Access to the trailhead requires passage over a private inholding. While access to the public is allowed during deer hunting season (mid-August to late September), the road is gated during the remainder of the year and requires a permit from the Forest Service. Contact the Santa Lucia Ranger District for further information.

Hi Mountain Campground is the nearest campground from Trout Creek Trailhead, being about two miles back up Hi Mountain Road. It has 11 sites and vault toilets, but no piped water. Reservations are not accepted.

For a truly fascinating side-trip in the area, continue up Hi Mountain Road to the Hi Mountain Condor Lookout. This retired fire lookout tower is now used as a research station, monitoring the re-introduction program for the California condor. Condors transit through the area from release sites in Ventana Wilderness to the north and the Ventura County backcountry to the south. While the population is still quite small, there is always a chance that you might see one on a hike in this region. Note that visiting the lookout requires prior coordination – check out their website for details of how to arrange a visit.

For post-hike refreshments, continue east on Pozo Road a short distance to the Pozo Saloon.  This local landmark was originally established in 1858 as a stagecoach stop, and features excellent food and drink, as well as ample historic ambiance.  Open-air concerts are frequently held here on Sunday afternoons.

If you would like to enjoy some wine on the way home from your hike, the tasting room for Ancient Peaks Winery is located in the middle of “downtown” Santa Margarita, just one mile before the Highway 101 interchange. Ancient Peaks features an excellent selection of wines, as well as tours of the vineyards at nearby Santa Margarita Ranch. For the more adventurous, the Ranch also offers zip-line tours. See their website for more details.

Further information

Trout Creek Trail and the Garcia Wilderness are managed by the Santa Lucia Ranger District of the Los Padres National Forest. The Los Padres website offers road condition updates and the latest fire restrictions, as well as a wide variety of other information about the area. While the website is updated frequently, it is always a good idea to call or stop by the ranger district office for the latest and most reliable information.

Santa Lucia Ranger District
1616 North Carlotti Drive
Santa Maria, CA 93454
Phone: (805) 925-9538

Hours: 8:00am – 4:30pm Monday – Friday

San Luis Obispo County Trail Guide is published by the Santa Lucia Chapter of the Sierra Club, and is probably the best guidebook to Trout Creek Trail and the surrounding area. The most current edition (3rd) was published in 2001, and while there have been some changes on the trails since then, it is still quite accurate. Day Hikes Around San Luis Obispo is another excellent guide to the area. While not nearly as detailed, it includes a greater variety of trails in the San Luis Obispo area.

More photos of this hike are on Flickr.

Download file: Trout Creek Trail - Garcia Wilderness.gpx


Click for weather forecast


Posted in Garcia Wilderness, Los Padres National Forest, Santa Lucia Ranger District | Tagged , , , , , , | 2464 Commentshttps%3A%2F%2Fwww.californiatrekking.com%2Ftrout-creek-trail-garcia-wilderness%2FTrout+Creek+Trail+-+Garcia+Wilderness2013-04-04+23%3A20%3A38California+Trekkinghttp%3A%2F%2Fwww.californiatrekking.com%2F%3Fp%3D246

Headlands Trail – Harmony Headlands State Park

A lovely hike to the sea in one of California’s newest state parks

First opened to the public in 2008, Harmony Headlands State Park is one of the newest state parks in California.  While the park is quite small at only 784 acres and generally undeveloped, it nonetheless offers a unique hiking opportunity for Central Coast residents and visitors alike.

Originally part of the Rancho San Geronimo land grant, the land was a working ranch until the 1960s.  Like Point Reyes to the north and other places along the California coast, Harmony Headlands was at one time proposed for subdivision and development.  The land was purchased by developers in 1975, but their plans to build hundreds of houses on the former dairy ranch never materialized.  The American Land Conservancy purchased the property in 2003 and transferred it to California State Parks.

Hike summary

Distance: 4.5 miles round trip

Elevation gain/loss: +250’/-250′

Hiking time: About 2 hours

Permits and fees:  No permits are required.  The park is open from 6:00 AM to sunset.  As of May, 2013, there is now a $3.00 parking fee to park in the trailhead parking lot along Highway 1.

Maps:  The Harmony Headlands State Park brochure on the California State Parks website is sufficient for this trail.  Alternately, the Cayucos 7.5’ quad can be used.  This map shows the old ranch road that is now the Headlands Trail, but does not show the park itself.

Best time to go:  The trail is suitable for hiking year-round.  Summers are usually cool and foggy in the mornings, with afternoon clearing.  Winter is colder with frequent rain.  There is almost no shade on the route, so bring adequate sun protection.

Trailhead

The Headlands Trailhead is located on the west side of Highway 1, between Cayucos and the tiny community of Harmony (population: 18).   It is approximately five miles north of Cayucos, or 2.6 miles south of Harmony.  A large ‘Harmony Headlands State Park’ sign marks the location of the trailhead, a gravel parking lot with space for about 10 vehicles.  Do not block the private driveway on the south side of the parking lot.  Overflow parking for a few additional vehicles is also available on the opposite side of the highway. This is a popular trail on the weekends.

Start of the Headlands Trail

Trailhead GPS Coordinates:  N35-28.697, W120-59.509.  Elevation 79’.

Route Description

From the parking area, the trail starts at a gate near a large sign board with a map of the park.  The route follows a wide former ranch road west toward the ocean, which is still out of sight over a low hill. At 0.4 miles from the trailhead, a side trail branches off to the right and leads quickly to an old ranch bunkhouse and a porta-potty.  The bunkhouse is sometimes used by park rangers or docents, but is otherwise not usually open to the public.

The old ranch bunkhouse sits just off the main Headlands Trail

From the bunkhouse, backtrack to the main trail and turn right, continuing toward the ocean.  At 0.75 miles, the trail passes a small pond on the left.  This man-made pond, dug when the park was a working ranch, is a good place for bird watching.

Beyond the pond, the trail climbs gently, then turns southwest and descends into a ravine.  The ravine narrows and our route passes between two small hills before emerging out onto a wide, grassy bluff overlooking the ocean.  Once out of the ravine, views open up in both directions.  Looking south, Morro Bay is hidden behind the much closer Point Estero, which lies just a little over one mile to the southeast.  However, on a clear day, Montaña de Oro State Park south of Morro Bay is visible on the horizon.  Views north encompass more undeveloped ranch lands between the park and Cambria.

View south towards Morro Bay and Montaña de Oro State Park

Out on the bluff, the main road turns northwest to run parallel to the ocean.  At 1.8 miles from the trailhead, you reach a park bench and a trail junction.  The main trail continues straight, while on the left a narrow, informal path descends closer to the edge of the bluff.  Continue on the main trail out to the fenced park boundary at 2.1 miles.

The main trail ends near some colorful sandstone formations

Here, you may either turn around and return on the main trail, or continue ahead on the narrow path that follows the edge of the bluff.  This path eventually loops back to the main trail near the park bench.  The informal path allows much closer views of the ocean, but is very narrow in some places and passes close to some steep drop-offs.  Although tantalizingly close, there don’t appear to be any safe paths down onto the beach itself.  Despite having no shade and only one park bench, this area makes a very nice place for a picnic before returning to the trailhead along the main trail.

The informal path along the bluff

Tips:

  • Harmony Headlands State Park is day-use only and has no facilities other than the porta-potty at the old bunkhouse.  No water is available; bring your own.
  • For families with small children, the main trail is suitable for jogging strollers.  The informal path along the bluffs is narrow in some places and passes close to some steep drop-offs.  Small children should be closely supervised in this area.

Also in the Area

There are many other hiking opportunities along Highway 1, both north and south of Harmony Headlands.   Just to the south, Estero Bluffs State Park is another recent addition to the California state park system and features a pleasant hike along the ocean.  To the north, Hearst San Simeon State Park has a boardwalk trail along Moonstone Beach in Cambria, and a longer trail near the San Simeon Creek Campground that runs into the hills above the ocean.

While Harmony Headlands itself does not have camping facilities, the San Simeon Creek Campground at Hearst San Simeon State Park is only 12 miles and 20 minutes’ drive to the north.  Both Cambria and Cayucos feature an extensive variety of hotels, motels, and bed & breakfast establishments.  Likewise, there are plenty of excellent restaurants in both towns.

If you would like to celebrate finishing your hike with a glass of wine, Harmony Cellars is a mere three miles to the north, just off Highway 1.  Turn right onto Harmony Valley Road, then right again up a short driveway.  The wines are excellent, and this is also a beautiful place for a post-hike picnic.

Further information:

Harmony Headlands State Park official park website

Cayucos Beach Cam (useful for checking weather conditions prior to your hike)

Harmony Cellars

Headlands Trail in Harmony Headlands State Park

Download file: Headlands Trail - Harmony Headlands State Park.gpx


Click for weather forecast

Posted in Harmony Headlands State Park | Tagged , , , , , , , , | 621 Commenthttps%3A%2F%2Fwww.californiatrekking.com%2Fheadlands-trail-harmony-headlands-state-park%2FHeadlands+Trail+-+Harmony+Headlands+State+Park2012-06-26+21%3A48%3A08California+Trekkinghttp%3A%2F%2Fwww.californiatrekking.com%2F%3Fp%3D62

The California Campfire Permit: Why You Need It and How to Get It Online

For seasoned hikers and backpackers in California, it’s a yearly ritual: remembering to obtain a California Campfire Permit for the year before that first trip of the season.  It’s easy to forget, and in times past it required either stopping at a ranger station on the way to the trailhead or making a special trip to an office that issued the permits.  Fortunately, it’s now possible to obtain your FREE Campfire Permit from the comfort of your own home and print it out before your trip.  Think of it as one less thing to forget to bring with you on your next backcountry trip.

First of all let’s review the rules regarding the Campfire Permit:

  • When is a California Campfire Permit required?  You must have a California Campfire Permit to use a stove, lantern, or campfire outside a developed campground or recreation area in California.  In other words, any sustained source of open flame is going to require a permit.  This includes portable backpacking stoves and propane camping lanterns.  You do NOT need a permit if you’re car-camping in a developed campground.  Developed campsites usually have prepared fire rings, fire pits, or grills for your convenience.  The fact that a permit is required for backpacking stoves may seem counter-intuitive, but if you’ve ever had a flare-up while lighting your stove, you’ll understand how easy it is to inadvertently start a fire.
  • Where is the permit required?  You will need the permit on both National Forest and Bureau of Land Management (BLM) lands in California.  This includes designated wilderness areas.  Note that many wilderness areas also required a Wilderness Permit for overnight visits.  In this case, you will need both permits if you plan to camp overnight and either use a stove or build a campfire.  Wilderness Permit requirements vary with each designated Wilderness Area, so be sure to check with the managing agency when planning your trips. Note that you do not need a California Campfire Permit when visiting California’s national parks, such as Yosemite or Sequoia/Kings Canyon.  However, you will need a Wilderness Permit and each park has its own separate rules regarding campfires and stove use that you will need to follow.  For example, Yosemite National Park prohibits wood fires (but not stoves) above 9600’ elevation due to the scarcity of fire wood and the fragile nature of the alpine plant community.
  • What are the seasonal requirements for the Permit?  The general rule is that the Permit is required 365 days a year, regardless of the current conditions in the place you happen to be building your fire at the time.  This might seem pretty absurd to you if you happen to be hunkered down in a winter rainstorm on the Lost Coast or Six Rivers National Forest, but it’s also highly unlikely that anyone will ask to see your permit under those circumstances.  Wildfires can break out at any time of the year in California, and southern California locations are particularly prone to wildfires outside of the traditional “fire season.”  During fire season, land management agencies utilize a three-level system of fire restrictions, depending on the current weather conditions and the likelihood of a fire breaking out.  While these restrictions vary with each agency, they can be summarized as follows:

Stage I.  Open campfires are prohibited outside of developed campgrounds.  You’ll still be able to use your backpacking stove, so this is a pretty minor inconvenience.  Note that the National Forests in southern California (Angeles, San Bernardino, Cleveland, and Los Padres) routinely impose Stage I restrictions every year for the entire fire season due to the particularly high risk of fire in these areas.

Stage II.  Open campfires are prohibited everywhere, including in developed campgrounds.  An exception may or may not apply for camping stoves.  Be sure to check with the land management agency before your visit for specific restrictions and exemptions.  Stage II orders are posted on National Forest and BLM websites, usually under the News or Announcements section.  You can also call the appropriate ranger station or BLM office for details.

Stage III.  The area is closed to public entry.  This is obviously the most extreme restriction, and is usually imposed only when there is already an active fire burning in the area or the risk of a fire breaking out is considered to be extremely high.  Some exemptions may apply, but in general it’s best to change your plans and go somewhere else.  Perhaps the beach…

As for the permit itself, it’s a simple document and looks like this:

Whether you obtain your permit online or in person at a ranger station or BLM office, be sure to fill out the required information and sign the permit.  Note that permits are valid for the remainder of the calendar year in which they were issued.  In other words, it’s best to get your permit as early in the year as possible.

When you sign your permit, you are agreeing to abide by the following rules when building a fire or operating a backpacking stove in the backcountry:

  1. Clear all flammable material away from the fire for a minimum of five feet in all directions to prevent escape of the fire.
  2. Have a shovel available at the campfire site for preparing and extinguishing campfires.
  3. Have a responsible person in attendance at all times.
  4. Extinguish campfire with water, using the drown, stir, and feel method.

As with any set of rules, it’s best to apply a little common sense in applying them.  For example, no ranger is going to inspect your campsite with a tape measure to make sure that you’ve cleared a perfect five foot circle around your fire.  In most cases, you will be camping at an established campsite that already has a fire ring of some sort. Clear any remaining duff and you’re good to go.  One item of highly flammable material that you want to keep at least five feet (if not 10-20 feet) away from an open campfire: your tent.

The shovel requirement is probably the least practical, and least-obeyed of these rules.  Unless you’re packing in on horseback, most people won’t bring a full-sized shovel on a backpacking trip.  At the same time, it’s unlikely that you’ll actually need one – particularly if you stick to established campsites and fire rings.

The requirement to have a responsible person in attendance at all times simply means that you shouldn’t leave your fire unattended.  Ever. Period.  This won’t present a problem if you’re just using a stove. However, if you have an open campfire, you’ll want to ensure that it’s completely out before you turn in for the night.

How exactly do you make sure that your fire is completely out?  Why, using the drown, stir, and feel method, of course.  Only water (and lots of it) can ensure that your fire is really extinguished.  In other words, covering your fire with dirt (presumably using that shovel that you’re supposed to be carrying) won’t cut it.  Pour as much water as you can onto the fire, then stir the ashes to dig up any buried embers that are still smoldering.  Pour some more water, then repeat until the fire site is cold to the touch.

As for obtaining your fire permit in the first place, the Sequoia National Forest has been kind enough to set up a self-issuing process on their website to allow you to download and print your own fire permit.  Here’s the link:

http://www.fs.usda.gov/detail/sequoia/passes-permits/?cid=fsbdev3_059516

You’ll be asked to complete a simple, four-question quiz, but the answers are on the website and they’ve even added a “cheat mode” to make it really easy.  Remember that the real purpose of the fire permit requirement is to educate visitors to the public lands about common sense fire safety precautions that you may or may not already be aware of.  Complete the quiz, and you’ll be able to download your permit in PDF format.  Print a copy, fill it out and sign it, and then carry it in your wallet or backpack.  Since the permit is good for the entire calendar year, I recommend that you keep an electronic copy of the PDF file in case you lose your printed copy.

UPDATE: Los Padres National Forest now has online campfire permits also. Their web page includes information about the permit and a link to a PDF version of a blank permit. No test required! There is also a link to current fire restrictions on the Los Padres.


Posted in Techniques | Tagged , , , | 965 Commentshttps%3A%2F%2Fwww.californiatrekking.com%2Fthe-california-campfire-permit-why-you-need-it-and-how-to-get-it-online%2FThe+California+Campfire+Permit%3A+Why+You+Need+It+and+How+to+Get+It+Online2012-06-03+06%3A27%3A29California+Trekkinghttp%3A%2F%2Fwww.californiatrekking.com%2F%3Fp%3D96

Tomales Point Trail – Point Reyes National Seashore

Experience stunning ocean views and see the Tule elk herd on a classic Point Reyes hike

Located only an hour’s drive north from downtown San Francisco, pastoral Point Reyes National Seashore seems a world away from the noise and traffic of the city.  The Seashore preserves most of the Point Reyes Peninsula, a unique geographical feature of the northern California coastline.  Established in 1962, Point Reyes was saved from development plans and today remains in much the same rural condition as it was in the mid-Nineteenth Century when it was used primarily for dairy farming.  Today, the few remaining dairy operations have switched from making butter to producing the world-renowned Point Reyes Blue Cheese.

Although a limited number of paved roads access many of the Seashore’s primary attractions, the majority of the park remains roadless, accessible only by an extensive network of hiking trails.  Unlike most national parks, Point Reyes has no overnight car camping facilities, and camping in the backcountry is limited to four designated camping sites.  Fortunately, all of the park’s numerous hiking attractions can be reached in a dayhike.

Located in the far northern corner of the Seashore, the Tomales Point Trail is one of the most spectacular hikes in the park.  Beginning at the historic Pierce Point Ranch, the trail follows an abandoned ranch access road along the length of Tomales Point.  While the maintained portion of the trail ends not far beyond the site of Lower Pierce Point Ranch, it is possible to follow a use trail that continues on to the very tip of the peninsula at Tomales Bluff.  At 9.4 miles round trip, the hike is one of the longer day hikes in the park.  However, the terrain is very gentle, with only slight ups and downs and no major climbs along the route.  The Tomales Point Trail also represents one of the premier wildlife viewing opportunities at Point Reyes, passing through the park’s Tule Elk Reserve, where a herd of approximately 450 tule elk thrives after being reintroduced in 1978.

Hike Summary

Distance: 9.4 miles round trip.

Elevation gain/loss: +1350’ gain/-1350’ loss.

Hiking time: 5-6 hours.

Permits and fees: None. Permits are not required for day hikes. Additionally, Point Reyes National Seashore currently does not charge an entrance fee.

Maps: Point Reyes National Seashore and West Marin Parklands: National Seashore and West Marin Parklands, Recreation Map, by Wilderness Press is a good, all-around map of the Seashore, and is detailed enough for hiking. This hike is also covered by the Tomales 7.5′ USGS topographic map. However, the quad only shows the trail as far as Lower Pierce Point Ranch.

Best time to go:  The trail is open and suitable for hiking year-round.  Wildflowers are at their best in late winter and early spring.  Rutting season for the tule elk runs from July through October.  During this time, males are more aggressive and it is more important to maintain a safe distance from the elk.

General map of Tomales Point area

Trailhead

To reach the trailhead, follow Sir Francis Drake Boulevard north along the west shore of Tomales Bay, passing through the small hamlet of Inverness.  Just after entering the park, turn right onto Pierce Point Road and continue north to the Upper Pierce Point Ranch.  Narrow Pierce Point Road passes by several working dairy ranches, so keep a lookout for cows!  A small parking lot at the Historic Upper Pierce Point Ranch is the only facility at the trailhead.  The paved road curves left and continues down a gully to the parking lot for McClures Beach, where restrooms are available.  McClures Beach, reached via a short trail, is one of the most spectacular and isolated beaches in the Seashore, and makes an excellent side trip while you are in this area.

Trailhead GPS Coordinates:  N38-11.344, W122-57.249.  Elevation 300’.

Route Description

The Tomales Point Trail itself leaves from the small parking lot and traverses around the buildings of Upper Pierce Point Ranch.  Ownership of the ranch was transferred to the National Park Service in 1973, and it has been maintained as an example of what dairy farming was like in the era before the Seashore was created.  It is definitely worth your time, either before or after the main hike, to spend a few minutes walking around the grounds of the ranch to get a feel for how isolated life was for the early dairy farmers who lived here over one hundred years ago.

Tomales Point Trailhead at Upper Pierce Point Ranch

Beyond the ranch, the trail gently climbs and arcs around a low hill to the left before descending into a small pass called Windy Gap.  If the weather is clear, there are outstanding views of the nearby Pacific Ocean along this stretch.  Steep, crumbling cliffs separate the hiker from the tantalizing pocket beaches that occasionally appear below the trail.  Clear weather is far from guaranteed here, as Tomales Point is one of the foggiest locations in the Seashore.  Coastal fog is often most prevalent in early summer, but can occur at any time of the year.  A mid-winter visit offers the best chance for fog-free hiking, although winter also brings the bulk of the area’s annual rainfall.  As with any hike, a thorough check of the weather forecast prior to setting out is essential.  Note that the area’s trails can remain very muddy for several days after a rain storm.

Fog often shrouds the west side of Tomales Point.

The section of trail between Upper and Lower Pierce Point Ranches provides the best opportunity on the hike to observe the herd of tule elk that call this area home.  The story of the tule elk is a fascinating example of how a unique species was saved from extinction.  Once common throughout Point Reyes and other parts of California, the elk were believed extinct in the mid-Nineteenth Century when a small herd was discovered in the Central Valley.  The herd was protected and eventually the population increased to the point that they could be reintroduced to Point Reyes.  Starting from a small group of only 10 animals in 1978, the herd now numbers around 450 elk.  In fact, the herd has grown so large that some animals have had to be relocated to other areas of the Seashore, and the Park Service has had to implement a birth control program for the elk!  What this means for the hiker, of course, is that you are virtually certain to see elk – lots of elk – along this trail.  With that in mind, it is important to emphasize that the elk should not be disturbed or approached too closely, especially during the rutting season from mid-summer to October.  A camera with a good zoom or telephoto lens is worth bringing along if you would like to get good photos of the elk.

Tule elk are frequently seen along the trail. Don’t approach too closely!

At Windy Gap, it is possible to see the Pacific Ocean to your left and the waters of Tomales Bay to your right.  The trail then climbs again to regain the main ridge of the peninsula.  After a short climb, a long ridgeline traverse leads to another brief descent to the site of Lower Pierce Point Ranch.  The site is marked by a grove of cypresses that once surrounded the buildings of the ranch.  Today, all of the buildings are gone, and only the trees remain.  Note that this small grove of trees is just about the only shady location along the entire trail.

From the ranch site, the trail climbs briefly again to regain the ridgeline, then continues on to a cliffside viewpoint overlooking tiny Bird Rock just offshore.  Here, the maintained portion of the trail ends.  To continue on to the very tip of the peninsula at Tomales Bluff, follow any of the numerous use trails that twist and wind through the waist-high coastal scrub brush for another ¾ mile.  Although the narrow paths and sandy soil make for slow, tedious hiking, you will eventually reach the bluff itself.  Here, a very steep, eroded path drops down to a small ledge directly over the ocean.  Views are spectacular, as you are surrounded on three sides by water and the point is popular with the local cormorants and pelicans.  Note that the last section of trail is not suitable for small children, and adults should exercise extreme caution due to the unstable nature of the soil here.

The steep, narrow tip of Tomales Point.

On a clear day, the small community of Dillon Beach can be observed less than two miles across Tomales Bay to the northeast.  For this reason, cell phone coverage is surprisingly good in this otherwise very isolated location.  While Tomales Bluff is a spectacular and very rewarding destination, realize that it is only the halfway mark of this hike.  After taking in the scenery and enjoying a well-deserved rest, it is necessary to turn around and make your way back the remaining 4.7 miles to Upper Pierce Point Ranch and your car.  Be sure to allow plenty of time to reach the trailhead before dark, especially in the winter.

Sheer cliffs overlook inaccessible pocket beaches at Tomales Point.

Tips:

  • The Tomales Point Trailhead at Upper Pierce Point Ranch has ample parking, but no other facilities. Restrooms are available at the McClures Beach Parking Area just down the road.
  • Tomales Point Trail is open to hikers and equestrians. Mountain bikes are not allowed.
  • The trail is day-use only. Wood fires and overnight camping are not allowed.
  • This hike is generally suitable for small children. Carefully consider the distance for the entire hike and your children’s abilities in deciding whether to bring them along. Also, the area at Tomales Point is not recommended for small children due to steep drop-offs and unstable terrain.

Also in the Area

Point Reyes has an incredible variety of trails, and you’ll want to consult a guidebook or other resource for other hiking opportunities. The Tomales Point Trail does not connect with the main network of trails to the south. However, the short hike down to McClures Beach is just down the road from Upper Pierce Point Ranch and is highly recommended as a short side trip.

Although there are no traditional car-camping opportunities in Point Reyes National Seashore, camping is available in Samuel P. Taylor State Park, east of the Seashore on Sir Francis Drake Boulevard.

Further information

The official website for Point Reyes National Seashore is the best resource for current information about conditions in the park, and should be consulted prior to a visit.
My go-to guidebook for Point Reyes is Jessica Lage’s Point Reyes: The Complete Guide to the National Seashore & Surrounding Area, published by Wilderness Press.

Download file: Tomales Point Trail.gpx


Click for weather forecast

Posted in Point Reyes National Seashore | Tagged , , , , , , | 321 Commenthttps%3A%2F%2Fwww.californiatrekking.com%2Ftomales-point-trail%2FTomales+Point+Trail+-+Point+Reyes+National+Seashore2012-02-22+05%3A41%3A40California+Trekkinghttp%3A%2F%2Fwww.californiatrekking.com%2F%3Fp%3D32